What is Laravel Jetstream?
Thank you for your continued support.
This article contains advertisements that help fund our operations.
Table Of Contents
Explaining Laravel Jetstream, which was introduced as Laravel's starter kit from Laravel 8 onwards.
What is Jetstream?
Laravel Jetstream.
Laravel Jetstream is a beautifully designed application starter kit for Laravel and provides the perfect starting point for your next Laravel application. Jetstream provides the implementation for your application's login, registration, email verification, two-factor authentication, session management, API via Laravel Sanctum, and optional team management features.
Jetstream is designed using Tailwind CSS and offers your choice of Livewire or Inertia scaffolding.
【Translation】
Laravel Jetstream is a beautifully designed application starter kit for Laravel, providing the perfect starting point for your next Laravel application. Jetstream implements login, registration, email verification, two-factor authentication, session management, API via Laravel Sanctum, and optional team management features.
Jetstream is designed with Tailwind CSS, and you can choose between Livewire or Inertia scaffolding.
In short, Jetstream offers a one-stop solution for many commonly used features in Laravel, with just one command.
What can Jetstream do?
composer require laravel/jetstreamBy running the command above, you can easily implement the following features:
- Login
- User Registration
- Email Confirmation
- Two-Factor Authentication
- Session Management
- API using Laravel Sanctum
- Team Management
- Tailwind CSS
- Livewire or Inertia (Vue only, React is not supported)
These features are also customizable.
Difference from Breeze
Laravel has another starter kit called "Breeze."
When creating a service, it's common to include user features, so a starter kit that quickly sets this up is attractive.
The choice between "Jetstream" and "Breeze" is an important decision, like choosing between Charmander or Bulbasaur in Pokémon.
What is Breeze?
Laravel Breeze is a minimal and simple implementation of all authentication features, such as login, registration, password reset, email verification, and password confirmation, into Laravel. Breeze also includes a simple "profile" page where users can update their name, email address, and password.
Breeze's default view layer is built with simple Blade templates styled with Tailwind CSS. Breeze also offers scaffolding options based on Livewire or Inertia, where Inertia-based scaffolding can use either Vue or React.
Here’s a summary of the features mentioned:
- Login
- User Registration
- Password Reset
- Email Verification
- Password Confirmation
- Profile Page
- Tailwind CSS
- Livewire or Inertia (Vue or React)
These are similar, but for more details, you should visit the documentation.
Installing Jetstream
First, install Jetstream
Enter the command to install.
composer require laravel/jetstreamThe following version was successfully installed.
Using version ^5.2 for laravel/jetstreamChoose the view template
You need to choose between Livewire or Inertia.
The reason is:
View [auth.login] not found.This indicates that the View files are missing.
If you use Livewire, you are developing with Laravel Blade; if you choose Inertia, you are developing with Vue for the frontend.
In this case, I'll select Inertia.
php artisan jetstream:install inertia --teams --ssrThe --teams option is for team functionality, and --ssr is for Server-Side Rendering. If these are not needed, omit them.
I’m executing all options to check them out.
At some point, you'll be asked if you want to run migrations. Select Yes.
New database migrations were added. Would you like to re-run your migrations?
YesContinue running the following commands.
npm i
npm run dev
If you see errors in the console, such as not being able to load Register.vue, you may need to configure port 5173 in Docker to allow external (browser) access.
Try configuring the app container and vite.config.js as shown in the following article.
→ How to Build a Laravel 11 Development Environment with Docker (With Video)
Check out the features
Authentication is implemented with Fortify
As mentioned earlier, Laravel Fortify is a frontend-independent authentication backend implementation for Laravel. Fortify registers the routes and controllers necessary to implement all of Laravel's authentication features, such as login, user registration, password reset, and email verification.
If you're new to Laravel, it’s recommended to explore the Laravel Breeze application starter kit before using Fortify. Breeze offers authentication scaffolding, including a user interface built with Tailwind CSS. Unlike Fortify, Breeze exposes the routes and controllers directly in your application, allowing you to become familiar with Laravel's authentication features before implementing them using Fortify.
For Laravel beginners, Breeze is recommended.
Login
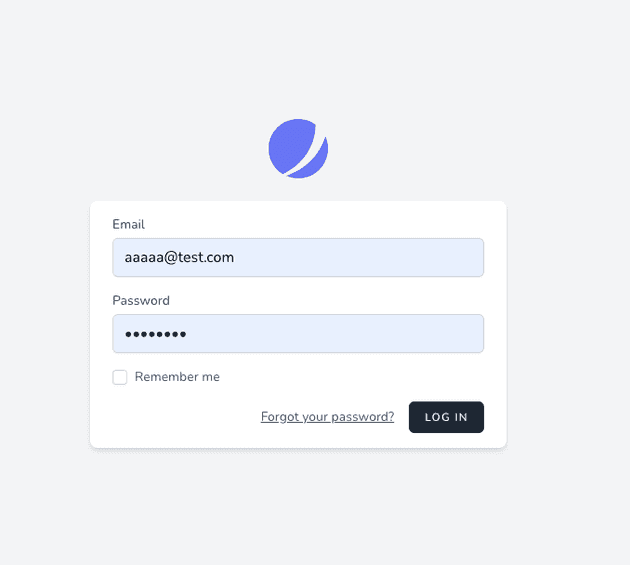
The top page header now displays login and registration links.
These are displayed as soon as Jetstream is installed.
The URL for the login page is /login.
However, the actual login page will be created after installing Inertia.
In my case, I encountered issues where the login page wasn’t generated immediately. This may vary, but the login page appeared later. It's functional and stylish after some customization.
Various settings are written in App\Providers\FortifyServiceProvider.
To customize the login process, add modifications to the boot() function in App\Providers\FortifyServiceProvider.
public function boot(): void
{
Fortify::authenticateUsing(function (Request $request) {
$user = User::where('email', $request->email)->first();
if ($user &&
Hash::check($request->password, $user->password)) {
return $user;
}
});
// ...
# }
By overriding `Fortify::authenticateUsing`, you can customize the login process in various ways, but I won’t go into it deeply this time.
There are also settings written in `config/fortify.php`.
[Customizing User Authentication](https://readouble.com/laravel/11.x/ja/fortify.html#ユーザー認証のカスタマイズ)
### New Registration Page
When you access '/register', there is a new registration page.

You can customize the new registration by modifying
`app/Actions/Fortify/CreateNewUser.php`.
### Email Verification
This feature, also known as email verification, sends an automatic email, and when the user clicks on the email link, their email is verified.
[→How to Implement Email Verification with Laravel Jetstream (Fortify)](/posts/fortify-emailverification)
### Two-Factor Authentication
Two-factor authentication is a feature that works with smartphone apps like Google Authenticator to add an extra layer of authentication. Without doing anything special, a template like the one below is automatically included.
As a developer, you can customize the appearance to suit your service while utilizing these features. It's convenient and greatly appreciated.
On the profile page, you'll see the following options:

When you try to enable it, a modal requesting the password appears.

A QR code will be displayed for the app to scan. You can use an app like Google Authenticator to scan the QR code and input the 6-digit code displayed on the app.

Recovery codes, which can be used when your phone is unavailable, will be displayed.

Log out and check the behavior. You'll see a screen asking for the code from Google Authenticator, like this:

[→How to Customize the Two-Factor Authentication Design in Laravel Jetstream](/posts/laravel-two-authenticate)
### Session Management
Session management, which seemed mysterious by its name alone, allows you to log out sessions on other devices if you're logged in on multiple devices.

[Official Documentation (English)](https://jetstream.laravel.com/features/browser-sessions.html)
### API with Laravel Sanctum
> Jetstream includes first-party integration with Laravel Sanctum. Laravel Sanctum provides a featherweight authentication system for SPAs (single page applications), mobile applications, and simple, token-based APIs. Sanctum allows each user of your application to generate multiple API tokens for their account. These tokens may be granted abilities / permissions which specify which actions the tokens are allowed to perform.
[Quote from Official Documentation](https://jetstream.laravel.com/features/api.html#introduction)
In short,
1. API authentication using tokens with Sanctum, compatible with mobile apps
2. Multiple API tokens can be issued
3. Permissions can be granted to the tokens
It seems these features are available.
By the looks of it, for features 2 and 3, you need to configure it by editing the settings in:
`config/jetstream.php`
```php
//About line 60
'features' => [
// Features::termsAndPrivacyPolicy(),
// Features::profilePhotos(),
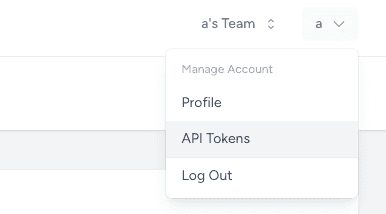
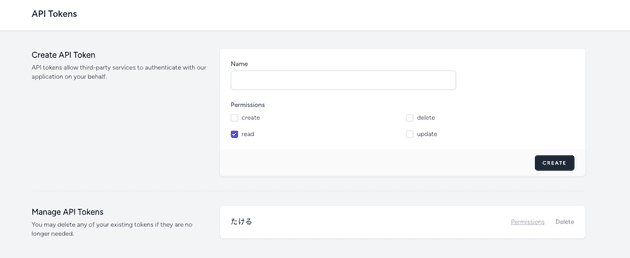
Features::api(), //Uncomment this lineThe "API tokens" menu was added to the top-right menu.
I tried selecting a name and permissions, then clicked CREATE.
As a result, the token was generated, and the issued token details were added to the table, as shown in the image.
This data is stored in the personal_access_tokens table, along with the associated user and permission level.
(It seems you can customize the model for authentication, apart from users.)
This feature appears to have many possible applications, but the use cases for token-only authentication seem somewhat limited.
For instance, GCP's API key is somewhat similar to this.
In cases where you need to integrate with external apps or mobile apps, it seems like you could just connect to the same database and log in based on user information, which is the only type of service I can think of.
If you're thinking of developer-facing services, you might start to imagine some use cases.
Team Management
This feature is available from the start when you install Jetstream with the --teams option.
Official Documentation (English)
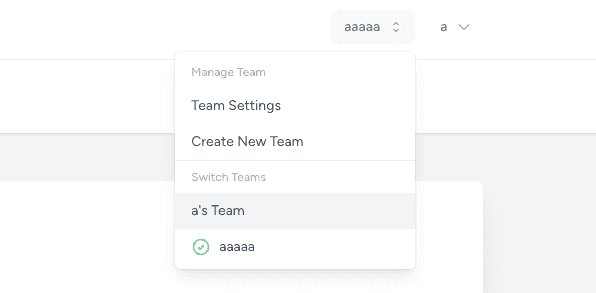
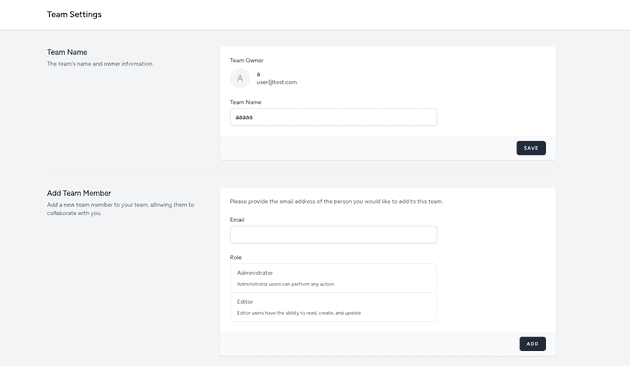
The team-related links are displayed in the top-right menu.
Team Settings
- Change the team name
- Add members (via email address)
- Delete the team
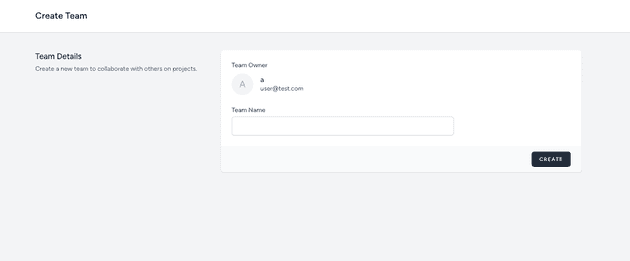
Create Team
Enter the team name and create a new one.
Related Database Tables
- teams
- team_invitations
- team_user
- users
It seems the current_team_id column in the users table stores the currently selected team.
If used well, this could be a useful feature when building SaaS for businesses.
Tailwind CSS
This is a CSS framework that is becoming more mainstream now.
Unlike Bootstrap, where you load all class definitions first, with Tailwind, you only load the classes you use by specifying them in the class attribute.
In short,
"Faster display" but "Increased development cost (you build as you go, and sometimes the build doesn’t reflect properly)"
Key Features:
- Mobile-first responsive design (using
min-width) - Easy-to-remember class names
- Fast display
- Readable official documentation
Since CSS won’t apply if you don’t build while using it, you need to run:
npm run devwhile working.
Livewire or Inertia
Livewire is chosen when writing the front-end based on Laravel's Blade templates.
Inertia seems to be chosen when writing the front-end with Vue.
Unfortunately, I couldn't find a way to select React for the Inertia pattern when installing Jetstream.
However, some contributors have developed a conversion package, and as of 2024, it works.
However,
If you're starting a new React and Laravel project I would recommend using Laravel Breeze instead as it has a first-party React version with almost all of the same features.
If you're starting a new React and Laravel project, I recommend using Laravel Breeze instead.
So, if you want to use React, Laravel Breeze might be the better option.
Conclusion
I deepened my understanding of Jetstream while testing the features myself.
Unless there's a particular reason not to, Breeze is probably sufficient.
Two-factor authentication and session management features can also be custom-built with Breeze.
I personally like Breeze and Sanctum for being clear and easy to use.
I hope this helps with your technical decision-making.


