How to prepare test data in Laravel (Using Seeder)
Thank you for your continued support.
This article contains advertisements that help fund our operations.
Table Of Contents
I will write about how to prepare test data in Laravel using Seeder.
What is test data?
When creating a service, various test data is prepared for posting information, image files, determining layouts, creating data retrieval logic, and so on.
In Laravel, using a feature called Seeder, you can easily share test data within the team.
It is a much more efficient method than individually inserting test data using tools like Tinker.
The content of this article is a summary of the official documentation (Seeding)
Verification environment
Laravel 6
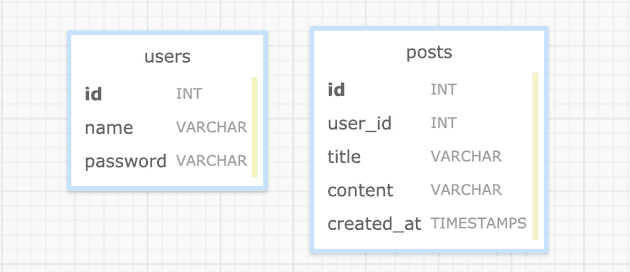
Table design
We will create test data for this table state.
Generating files with a command
Generate a Seeder file with a command.
php artisan make:seeder UsersTableSeederdatabases/seeds/UsersTableSeeder.php has been generated.
Writing test data in the Seeder
UsersTableSeeder.php
<?php

use Illuminate\Database\Seeder;
use Illuminate\Support\Facades\Hash;

class UsersTableSeeder extends Seeder
{
    public function run()
    {
        DB::table('users')->delete();

        $data = [
            [
                'name' => 'User 1',
                'email' => '[email protected]',
                'password' => Hash::make('password'),
                'created_at' => now(),
                'updated_at' => now()
            ]
        ];

        DB::table('users')->insert($data);
    }
}
There are various ways to write, but I define $data like this and insert it.
Defining in DatabaseSeeder.php
Edit databases/seeds/DatabaseSeeder.php to load the Seeder file created earlier.
    public function run()
    {
        $this->call(UsersTableSeeder::class);
    }
Once defined like this, run the command.
composer dump-autoloadWhen classes are loaded like below, it's OK.
composer dump-autoload
Generating optimized autoload files
> Illuminate\Foundation\ComposerScripts::postAutoloadDump
> @php artisan package:discover --ansi
Discovered Package: diglactic/laravel-breadcrumbs
Discovered Package: facade/ignition
Discovered Package: fideloper/proxy
Discovered Package: laravel/tinker
Discovered Package: laravel/ui
Discovered Package: nesbot/carbon
Discovered Package: nunomaduro/collision
Package manifest generated successfully.
Generated optimized autoload files containing 5233 classes
Then, all you have to do is run the seeder with a command.
Commands
php artisan db:seed
or
php artisan migrate:fresh --seed
php artisan db:seed is used when you simply want to load Seeder files without affecting the database.
php artisan migrate:fresh --seed is used when you want to refresh the data (initialization) and then insert test data using Seeder.
In the development environment, using Seeder to generate test data is usually the best approach, so personally, I often use
php artisan migrate:fresh --seedUsing a for loop in the Seeder file
A sample is provided below.
Please refer to it.
    public function run()
    {
        DB::table('users')->delete();

        for($i = 0; $i < 100; $i++){
            $data[] =
            [
                'name' => "User ${i}",
                'email' => "user${i}@test.com",
                'password' => Hash::make('password'),
                'created_at' => now(),
                'updated_at' => now()
            ];
        }

        DB::table('users')->insert($data);
    }
You can simply add to the array.
Summary
How was it?
The above are the steps to use Seeder to create test data in Laravel.
If you have any feedback or find any typos, please contact me via Twitter DM.
Popular articles


