How to Customize the Two-Factor Authentication Design in Laravel Jetstream
Thank you for your continued support.
This article contains advertisements that help fund our operations.
Table Of Contents
Explanation on how to customize the design of two-factor authentication in Laravel Jetstream.
Introduction
Since we chose Jetstream with Inertia, this will be based on Vue.
Checking the APIs Used for Two-Factor Authentication
php artisan route:listUse the command above to check the available APIs.
APIs used during login after setup.
- GET|HEAD two-factor-challenge
- POST two-factor-challenge
APIs used for setup or deactivation
It appears that there are no APIs specifically for the UI.
- POST user/two-factor-authentication
- DELETE user/two-factor-authentication
- GET|HEAD user/two-factor-qr-code
- GET|HEAD user/two-factor-recovery-codes
- POST user/two-factor-recovery-codes
- GET|HEAD user/two-factor-secret-key
Rough Overview
In the users table, the following columns are relevant:
- two_factor_secret
- two_factor_recovery_codes
- two_factor_confirmed_at
When the two_factor_confirmed_at field has a date, it seems to indicate that two-factor authentication has been "set up."
Files for Customizing the Design
Location to Enable Two-Factor Authentication
URL: http://localhost/user/profile
File location: resources/js/Pages/Profile/Partials/TwoFactorAuthenticationForm.vue
Modal: resources/js/Components/ConfirmsPassword.vue
The display toggles between "enabled" and "disabled" states based on the twoFactorEnabled variable.
After entering the password, the confirm variable becomes true.
In short, it’s a bit complex.
However, it seems you can customize most of the design by modifying these files.
Since this feature is not likely to contribute much to sales, and it already looks polished, it might suffice to simply make the expressions clearer in Japanese.
Personally, I wouldn't bother with the design.
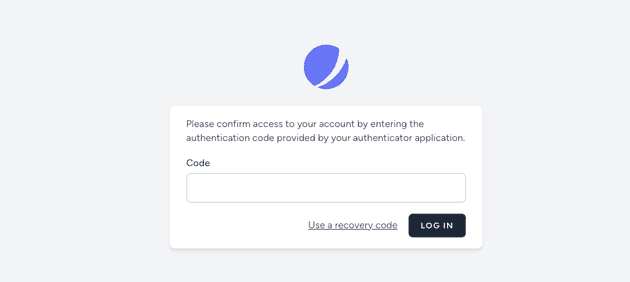
Inputting the Code During Login
URL: http://localhost/two-factor-challenge
File location: resources/js/Pages/Auth/TwoFactorChallenge.vue
For Those Who Want to Dig Deeper
If you are interested in not just UI customization but also understanding the underlying mechanisms, you can check out the four controllers in:
vendor/laravel/fortify/src/Http/Controllers/TwoFactor~~~Controller
By following the logic here, you can understand how the process works.
After entering the password during setup, the response will generate the QR code in SVG format, the secret, and the recovery codes. Based on this, the UI will be updated.
When you input the code from the Google Authenticator app, the process moves forward in a way that’s somewhat complex. I’ll admit, it was tough to fully read through the code, so I think I’ll just be grateful for the functionality and use it as is.
Conclusion
After spending some time investigating two-factor authentication, here are my takeaways:
- The files related to design are surprisingly few.
- Trying to track all the logic is too difficult.
I think I’ll simply translate the necessary parts for Japanese users and make use of it as is.
It’s a fantastic feature, and I’m truly grateful for it.


