For Beginners How to Validate Using Laravel Form Requests
Thank you for your continued support.
This article contains advertisements that help fund our operations.
Table Of Contents
Let's implement validation using Laravel Form Requests. The reason for using Form Requests is to improve readability by reducing the controller's code. Let's give it a try.
Environment
MacOS
Laravel 6
Code from Previous Article
Controller
    public function store(Request $request)
    {
        // Additions
        $validator = Validator::make($request->all(), [
            'name' => 'required',
            'title'  => 'required',
            'content' => 'required'
        ]);

        if ($validator->fails()) {
            return redirect()->back()
            ->withInput()
            ->withErrors($validator);
        }
        // Additions end here

        $post = new Post;
        $post->name = $request->name;
        $post->title = $request->title;
        $post->content = $request->content;
        $post->save();
        return redirect()->route('post.create');
    }
We wrote code like this last time. Now, let's move this to a Form Request.
⇨ Relevant page in the official documentation
Implementation
You can almost copy and paste the code from the previous article to implement it.
First, create a file with the command.
php artisan make:request PostRequestThis command creates App/Http/Requests/PostRequest.
Edit that file.
<?php

namespace App\Http\Requests;

use Illuminate\Foundation\Http\FormRequest;

class PostRequest extends FormRequest
{
    public function authorize()
    {
        // Return true when user authentication is necessary
        return true;
    }

    public function rules()
    {
        return [
            'name' => 'required',
            'title'  => 'required',
            'content' => 'required'
        ];
    }
}
Simply copy the validation rules you created in the previous article and modify the authorize function as needed.
Modify the Controller.
use App\Http\Requests\PostRequest;

~~~~~~~~

    public function store(PostRequest $request)
    {
        // Additions
        // The commented out part is no longer necessary
        // $validator = Validator::make($request->all(), [
        //     'name' => 'required',
        //     'title'  => 'required',
        //     'content' => 'required'
        // ]);

        // Validation: Error
        // if ($validator->fails()) {
        //     return redirect()->back()
        //     ->withErrors($validator)
        //     ->withInput();
        // }
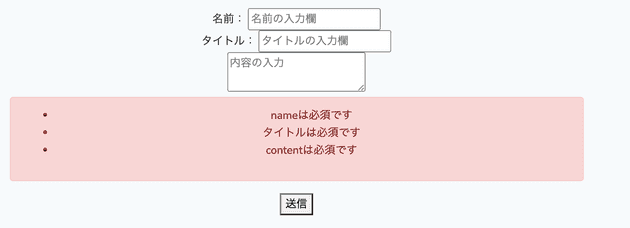
That's it! Just like last time, it was displayed as shown in the image.
If you have been following from the previous article, you can implement it very easily.
By following the rule of using Form Requests for validation, development becomes clearer and the Controller looks cleaner, so I recommend it.
=> Solution for when errors are not displayed in Laravel validation
Summary
How was it?
I wrote about Laravel validation methods.
There are various ways to write it, but I think the method using Form Requests like this article is the best method. What do you think?
Finally, here is a recommendation of a book for beginners.
If you have any complaints or corrections regarding the content of the article, please DM me on Twitter.


