For Beginners The Easiest Way to Validate in Laravel
Thank you for your continued support.
This article contains advertisements that help fund our operations.
Table Of Contents
Let's implement the easiest validation in Laravel. We will add validation to the post feature we created last time.
Validation is a feature that, for example, "rejects non-numeric values," "rejects empty required fields," and "rejects values that exceed the character limit."
If unexpected data is entered into the system, it can lead to errors, so it is important to set up validation properly.
Environment
MacOS
Laravel6
Code for Creating the Post Feature in the Previous Article
Controller
<?php

namespace App\Http\Controllers;

use Illuminate\Http\Request;

// Additional
use App\Post;

class PostController extends Controller
{
    public function store(Request $request)
    {
        $post = new Post;
        $post->name = $request->name;
        $post->title = $request->title;
        $post->content = $request->content;
        $post->save();
        return redirect()->route('post.create');
    }
}
This controller allows saving three fields: name, title, and content.
Implementing Validation
This article explains the simplest method of writing validation in the controller. Eventually, try challenging with Form Requests.
⇨Validating in Laravel with Form Requests
The validation we will add this time makes all fields "required".
// Additional
use Validator;

class PostController extends Controller
{
    public function store(Request $request)
    {
        // Additional
        $validator = Validator::make($request->all(), [
            'name' => 'required',
            'title'  => 'required',
            'content' => 'required'
        ]);

        if ($validator->fails()) {
            return redirect()->back()
            ->withInput()
            ->withErrors($validator);
        }
        // Additional until here

        $post = new Post;
        $post->name = $request->name;
        $post->title = $request->title;
        $post->content = $request->content;
        $post->save();
        return redirect()->route('post.create');
    }
}
This is the simplest way to add validation functionality.
Explanation
It's mostly standard text.
The part that changes depending on the functionality is here:
// Additional
$validator = Validator::make($request->all(), [
    'name' => 'required',
    'title'  => 'required',
    'content' => 'required'
]);
For fields that are not required, you can specify nullable, and for string fields, you can specify string.
For more information on what can be specified, refer to the Laravel official documentation "Available Validation Rules".
Specifying Multiple Validations
// Additional
$validator = Validator::make($request->all(), [
    'name' => 'required|string',
    'title'  => 'required|string',
    'content' => 'required|string'
]);
You can specify multiple validations by separating them with | like this.
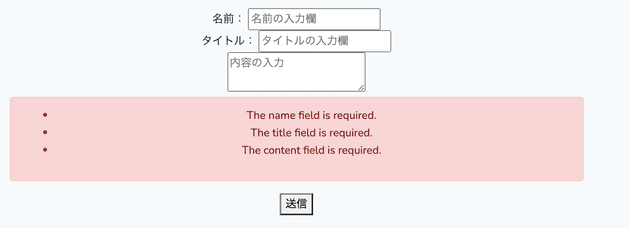
Communicating which field's validation failed to the user
@if ($errors->any())
    <div class="alert alert-danger">
        <ul>
            @foreach ($errors->all() as $error)
                <li>{{ $error }}</li>
            @endforeach
        </ul>
    </div>
@endif
Try including this in your Blade file. It will display like this when validation fails.
The $errors variable is set up in middleware to not display when empty, so there is no need to check if it's empty using !empty().
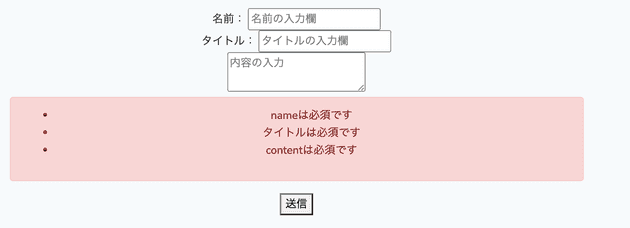
Setting Custom Validation Messages
You can freely set validation rules like required and column names like name.
This is done using localization features in Laravel, as mentioned in the official documentation.
First, modify config/app.php.
'fallback_locale' => 'ja',Change en to ja.
Next, create resources/lang/ja/validation.php.
Inside, write:
<?php
return [
    'required' => ':attribute is required',

    'attributes' => [
        'title' => 'Title'
    ]
]
The places where it said required and title have now been changed to the custom messages we set: "is required" and "Title".
This allows for flexible customization.
=>Resolution method when Laravel validation errors are not displayed
Summary
How was it?
I wrote about the simplest way to validate in Laravel.
Validation is a crucial aspect if you want to advance in backend development and work in the field.
Although I covered this writing method this time, let's challenge ourselves to take it up a notch (avoiding fat controllers).
⇨Validating in Laravel with Form Requests
Most of the implementation can be done using the method described in this article.
Finally, I'll end by recommending a book!
For complaints or inquiries about the article content, please contact me via Twitter DM.


