How to Set Up a Development Environment from a WordPress Production Environment
Thank you for your continued support.
This article contains advertisements that help fund our operations.
Table Of Contents
This article summarizes how to set up a development environment inherited from a production environment already deployed on a WordPress rental server.
I have been tasked with taking over and operating a WordPress site that is already operational in a project, and it seems that the web design company is not using management tools like GitHub (managing individually on each computer). There is no reason not to use them, so I transferred it to GitHub.
It's easy.
⇨ Why ConohaWing is Recommended for Starting a Blog with WordPress
⇨ When a WordPress site is slow, there may be a delay in the rental server itself
Environment
MacOS
Configuration of WordPress
It seems that WordPress is downloaded as a set and then modified for a custom theme.
Downloading the set can be overwhelming due to the large number of files, but the place to edit the "theme" is
wordpress/wp-content/themes/theme name
So, it is possible to set up the environment by managing the directory of the theme name on GitHub.
If you are starting WordPress now, ConoHa WING is the only choice.
Steps
① Download the theme part to your computer using an FTP tool like Filezilla
The theme part refers to the theme name folder of
wordpress/wp-content/themes/theme namementioned earlier.
② Install MAMP (for Mac)
It is good to leave the database and Apache-like settings to this tool.
For Windows, I often hear that XAMPP is the easiest tool to use.
③ Install WordPress
The downloaded wordpress should be placed in the folder of MAMP installed earlier.
By default, it should be /Applications/MAMP/htdocs.
/Applications/MAMP/htdocs/wordpressif it is like this, it's OK.
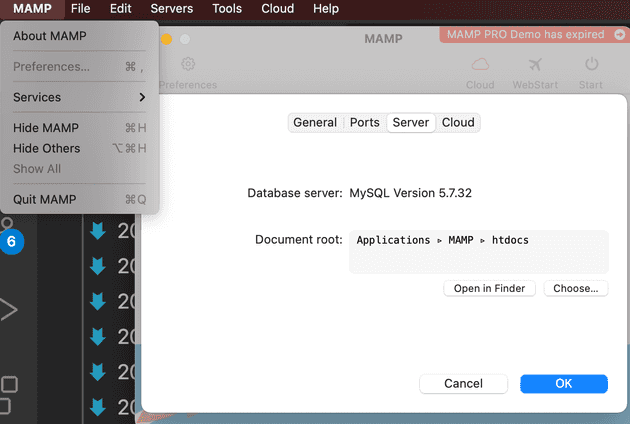
④ Change MAMP DocumentRoot (base path)
Set the DocumentRoot of MAMP to the folder where you moved the wordpress folder earlier.
/Applications/MAMP/htdocs/wordpress

⑤ Open http://localhost
Follow the on-screen instructions.
In the case of MAMP,
The database username and password are "root", "root"*XAMPP users should have different usernames and passwords.
If you can select and reflect the theme without any errors from the WordPress management screen, then you have succeeded.
Next, we will move on to managing it on GitHub.
Managing on GitHub
Create a repository on GitHub
(I will not write here about linking a GitHub account to your PC)
Log in to GitHub ⇨ Repositories ⇨ New
Create a repository with the same name as the theme in the Repository name (the name can be anything, but for clarity, let's use this name)
Select Public or Private (for projects, it is advisable to choose Private)
Public means public, Private means private repository
Upload the copied theme to the GitHub repository
Move to the directory of the theme you downloaded to your computer.
git init
git commit -m "first commit"
git remote add origin Write the SSH path here (ex: [email protected]:account name/test.git
git push -u origin master (in the case of the master branch)
Production environment and management screen different?
It seems that WordPress allows you to customize the management screen.
On the subject of customizing the management screen, it seems to be managed by the database.
So, let's copy the database of the production environment.
Install plugins in the production environment
Install new plugins in the production environment.
*Please take responsibility for any issues caused by installing plugins.
This plugin is a must-have for taking backups.
All-in-One WP MigrationExport it.
Import it into the development environment
Install the same plugin in the development environment.
Then, import it. When importing, there will be a confirmation screen
Confirm the URL and make sure it is a local environmentbefore importing.
This should make the management screen the same as the production environment.
Summary
That's all.
We have set up a development environment from the situation that was raised in the production environment.
Now then!
For WordPress, we recommend ConoHa WING as the rental server.


